I only found out about this way of sowing seeds recently. Apparently seed snails have been trending for 2 or 3 years, and people have had positive results. I am attracted to it as it takes up less room. We start most of our seeds in the house and so this would be great for me. I might be able to use my conservatory dining table longer. Usually by Easter it is covered in seedlings. Another advantage is that it trains longer roots which means less watering in the future.
The snails can be made out of most things, including fabric, wax paper, or recycled compost bags. When chosing what to use it is important to remember that things like newspaper, or fabric may dry out easier and therefore need more watering and care.
I chose bubble wrap as I had some in my cupboard and my home is cold. We sometimes insulate the green house windows with it. When I lived in a rented flat I used to cover the bathroom windows to warm the room up.
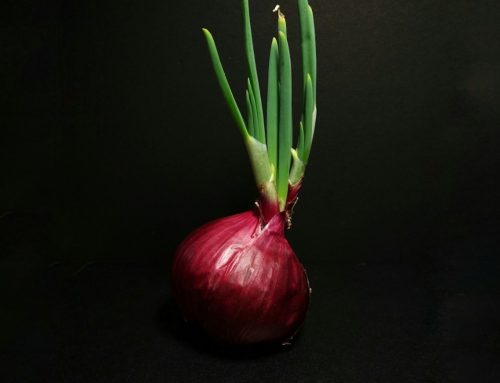
This kind of sowing isn’t really suitable for large seeds that need more soil, like peas, beans, courgette, or for root crops. I am using it for peppers, some tomatoes, pac choi, and onions.
What you need
A strip of waxed paper, fabric, foam, plastic, or what ever you are using. It wants to be 3 or 4 inches wide and about 3 feet long.
Seed starting or potting compost.
A pair of scissors
Tape.
Method
1. I put down newspaper to protect my table from the compost as a bit does come out.
2. On top I placed my strip of bubble wrap. The piece shown was cut in half, lengthways.

3. Compost was placed on the strip. I left a gap at one end, and a bit of a gap at the top. This made it easier to roll and stick together.

4. If the soil isn’t very damp, use a spray to add water. It doesn’t want to be soaking.
5. Roll the strip up like a swiss roll, starting at the end without a gap. Roll it firmly, but don’t roll it too tightly or else the contents will squeeze out.
6. Secure the end with tape. It could be tied with string instead.

7. Stand the roll up and press down the soil at the top, in between the swirls, with a finger.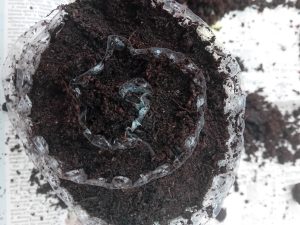
8. Sow your seeds. If you want to label them you can still, using lolly sticks or something placed in the spiral. More than one kind of seeds can be sown. Sprinkle some compost on top.
9. Water gently, not too much.
10. Place a plastic bag over the top to keep it warm or make a mini greenhouse with a pop bottle as I have done. 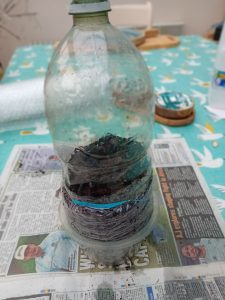
10. If you are making loads place them in a trays. I was only making one yesterday and so placed it into a recycled round container too keep it standing up. Water regularly from the top. A little water can be placed in the tray or container as well.
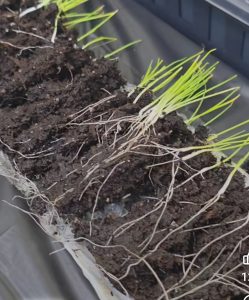
11. As seedlings start to form and get true leaves, you can either add more soil to make a fatter snail, or transplant every other seedling into a new snail roll to give it room to grow. You should find that roots don’t seem to entangle as much using this method.
Wish me luck. 😊. Have you made seed snails, and if so have they been successful.
Update.
They were sucessful but were a lot of faff and so I am not sure if will do them again.bi found them hard to water and take care of, ans very messy.
Other blogs you may be interested in.

I’m trying seed snails this year too in bubble wrap as our house is cold, onions for now and sowing tomatoes and peppers next week . I’m hoping it will mean I don’t need to pot on as space here is also limited with our north facing house, light is an issue too because hubby doesn’t want grow lamps. Good luck too 🤞🤞fingers crossed for us.
I hope it works for you. I don’t have grow lights either, but my conservatory is facing South East. Fingers crossed that we have onion seedlings soon.
What a great idea. Definitely going to try that method.
Thanks
I know you said not root crops but I wonder if carrots would work? You can buy carrot seedlings.
They might for when transplanted. I do transplant carrots sometimes when grown in trays though, sometimes.